How to Install and Use Illustrator Brushes
What are Brushes and Brush Libraries?
Brushes are Illustrator presets that are applied to the stroke of a shape or path. The stroke is the outline of a shape or path, and simply put, brushes are a great way to jazz up the stroke. A set of brushes or other presets in Illustrator is called a library. Here's a guide to getting your new brushes up and running.
How to Install Brushes
Unpack your Brush Library
Unzip your new product files and locate the brush library. Brush libraries end in .ai (which is the extension for any Adobe Illustrator file) so it might be a little tricky to figure out which one is a brush library. Often, sellers name the file descriptively (with “library” in the file name) so it's easy to find. Once you've got a good idea where the brush library is, head on into Illustrator to install it.
Installing the Brush Library
There are a number of ways to install brush libraries. Here is one easy way. Simply go to Window > Brush Libraries > Other Library... and locate the desired brush library, then click Open.
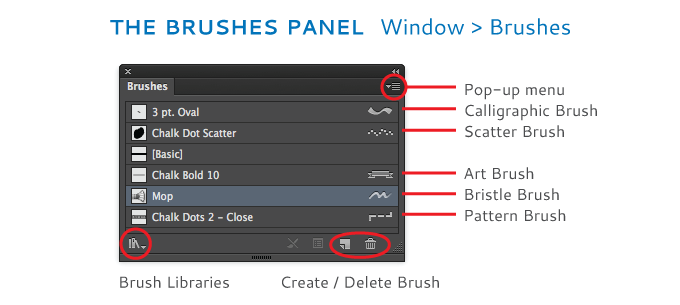
In addition to your main Brushes Panel (Window > Brushes), you will now see a panel for the new library. Brushes you select and use from the new brush library panel will automatically appear in your main Brushes Panel. There are a few differences between the two panels:
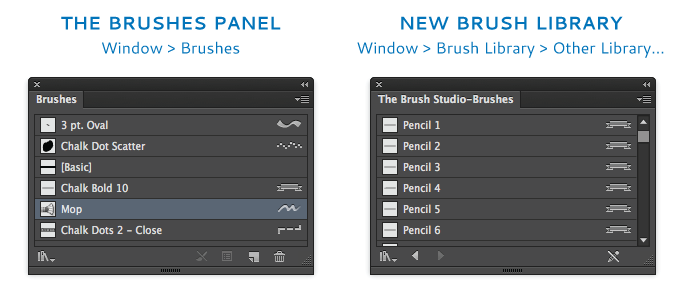
From the main Brushes Panel, you can create, edit and delete brushes, and install brush libraries. The brush library panel doesn't allow you to do any of that; instead, it simply shows you what's available. The new brush library panel will stick around as long as Illustrator is open. When you quit Illustrator, the panel will disappear, and you'll have to re-access the brushes next time you want to use them. However, here's a couple tricks that will keep your new brush library handy every time you restart Illustrator.
Make the Brush Library Panel Persistent
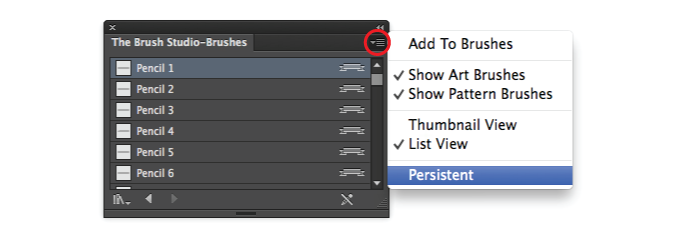
On your brush library panel (not the main Brushes Panel) go to the pop-up menu and check “Persistent,” and your brush library should be accessible every time you start Illustrator.
Alternatively, you can copy and paste your new brush library into one of the folders in the Illustrator preset folders, found in your system here: Adobe Illustrator (Version) > Presets > (Language) > Brushes > (folder), then access it from Illustrator by going to Window > Brush Libraries.
Now that you've installed your new brush library, let's meet your new brushes.
Meet Your Brushes
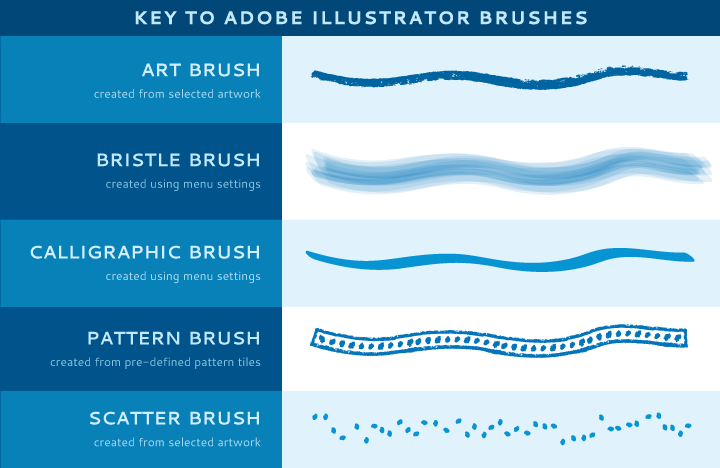
Adobe Illustrator has five distinct brush types, and each one has many awesome possibilities. Here's a brief guide to the five brush types:
Art Brushes
These fantastic and useful brushes are some of the most fun to use. At its most basic, an art brush stretches any selected artwork along a vector path or shape. These brushes can transform a plain, regular path into something that looks handmade, colored, sketched, inked, or scribbled with chalk. To learn how to create these beautiful, handmade brushes, check out this tutorial.
Calligraphy Brushes
Calligraphy Brushes use settings in Illustrator to create a brush with a variable stroke width, simulating the graceful strokes of a calligraphy pen. You can create these from scratch simply by using the Create New Brush button on the Brushes Panel, or edit the settings on existing calligraphic brushes.
Pattern Brushes
This particular brush is the most complicated to make, using five pre-defined pattern tiles to create a pattern that can be repeated along any vector path or shape. These are a lot of fun to use! If you're interested in creating your own, check out this tutorial.
Scatter Brushes
A Scatter Brush scatters selected vector artwork over a path or shape. You can adjust settings to randomize, space out, and rotate scattered shapes over a path.
Bristle Brush
The newest member of the Illustrator brush family, the Bristle brush naturally simulates the bristles of a physical brush. You can adjust settings to change the shape of the brush head and change length, thickness, and density of these digital “bristles.”
Each of these five brush types is represented in the Brushes Panel with a different icon:
Using Brushes
There are two different ways to use your new brushes. You can either use the Paintbrush Tool to draw a path with a brush already applied, or you can apply a brush to an existing path. Let's get started!
Paintbrush Tool
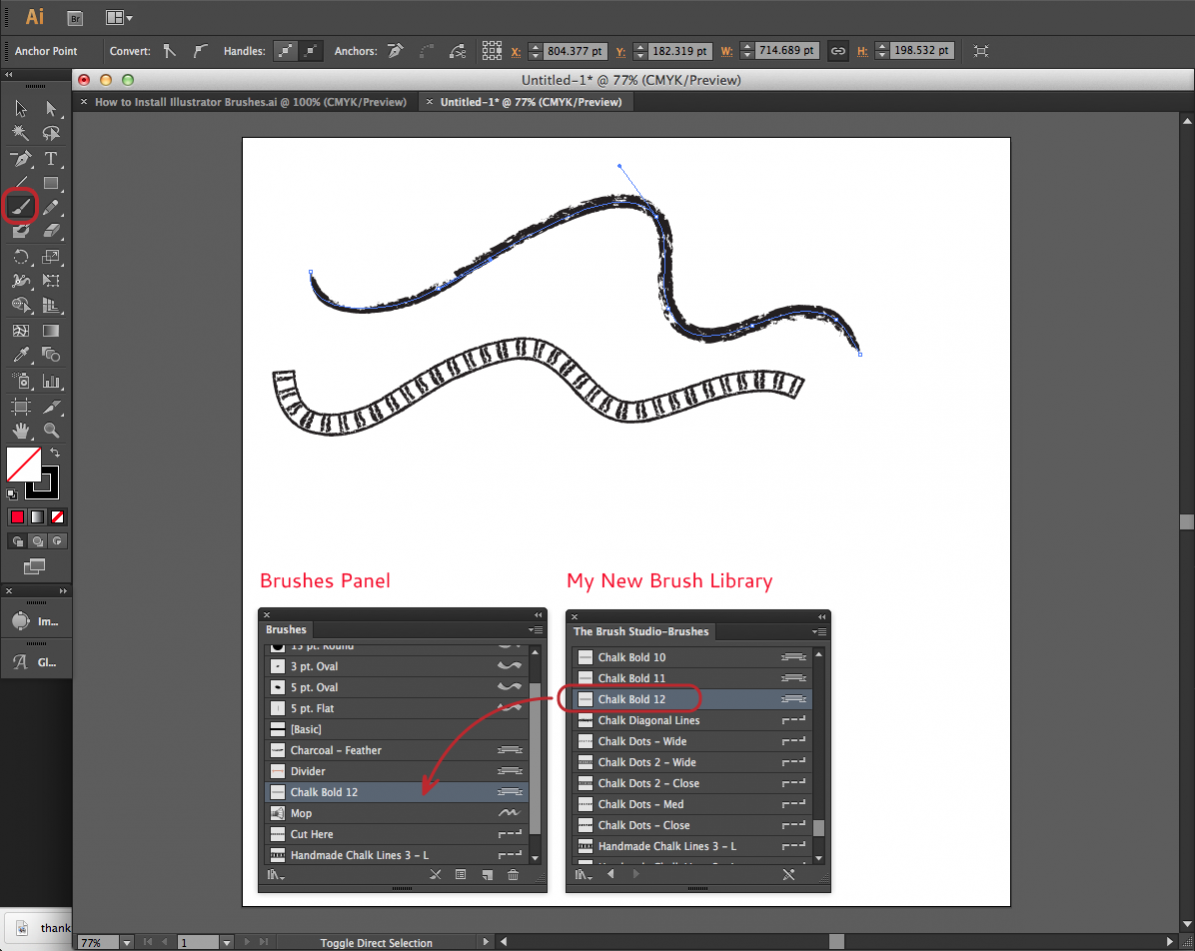
In your Brushes Panel (or in your new brush library panel), select the brush you want. Then select the Paintbrush Tool (in your Tools Panel) and draw a path. Here, I've used two brushes from my new library (one art brush and one pattern brush from here.) When I select and use the new brushes, they jump into the main Brushes Panel. From the Brushes Panel, I can edit the brush if I decide to change settings. To edit the settings of a brush, simply double click the brush from the Brushes Panel.
Apply a Brush to an Existing Path
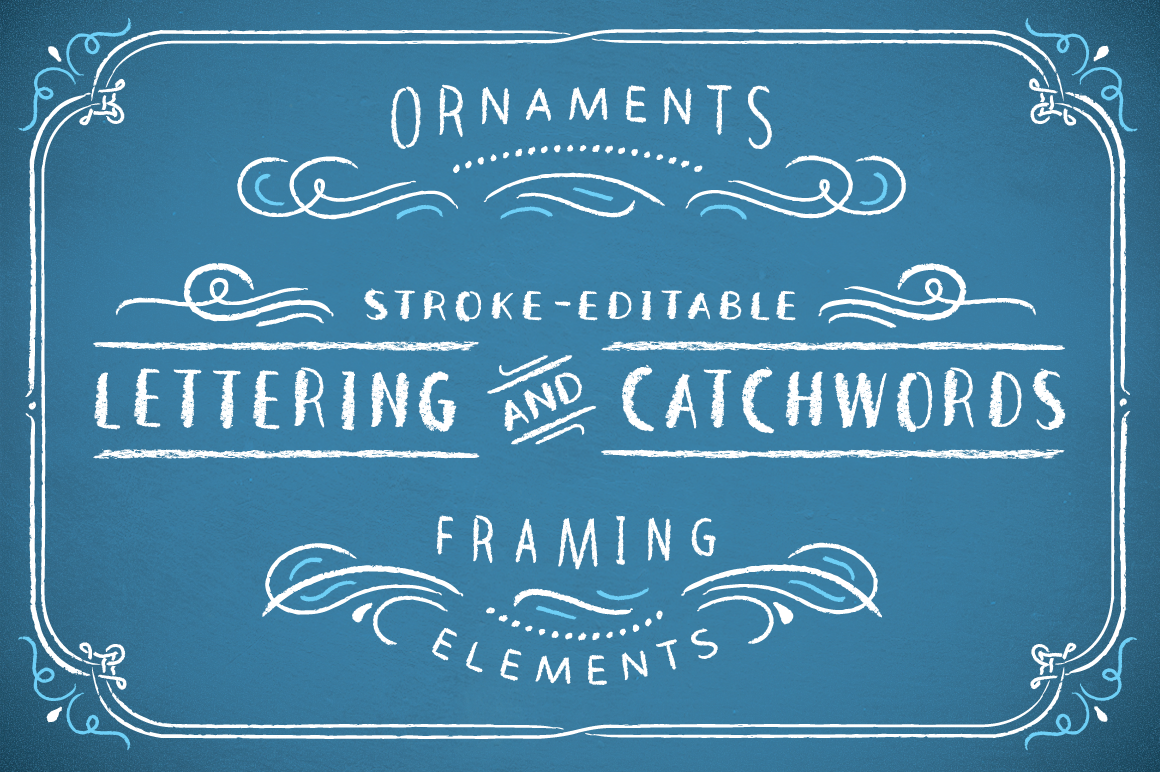
Alternatively, you can draw a path using the Pen Tool, Pencil Tool, any of the line tools, or any of the shape tools, then apply a brush to those paths. First, draw the path or shape with the tool of your choice. Then, with the path selected (use the Select Tool or Direct Select Tool), choose a brush. The brush will be applied to the stroke of the path. I've used brushes from The Brush Studio to create a handmade look on all of these paths:
Have fun with your new brushes! What will you create?
Source :- creativemarket.com
Comments
Post a Comment