How to Install and Use Photoshop Brushes
What are Photoshop brushes?
At its most basic, the Photoshop brush tool is used for drawing lines and shapes in any color on a layer in your document using strokes. After selecting a brush, you can draw simply by clicking the left mouse button a single time, or by holding it down and dragging your cursor around the page to create multiple marks with a single stroke.
Why are Photoshop brushes useful?
Despite the term "brush," you can use brushes for much more than just replicating physical media like paints. In fact, brushes can be used for everything from textures and patterns to lighting. The ease of use and versatility of this tool make it a handy resource for both the novice and the expert designer to add depth to your projects.
Installing Brushes
Much like installing actions, installing brushes is a very easy process. Follow these simple steps:
1. If you don't have any brushes, grab a set from the great selection available on Iam Designer.
2. Download the zip file containing your brushes and unpack the contents of the file. This will reveal a new folder containing a few other files, one of which is a .ABR brush file.
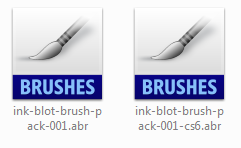
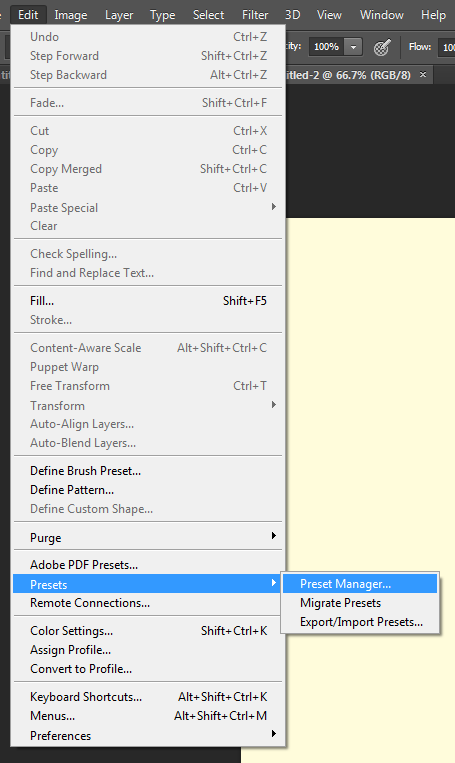
3. You can either drag this .ABR file directly into your Photoshop window, or you can go under Edit > Presets > Preset Manager, select Brushes from the drop down menu, and then add your brushes using the "Load" button.
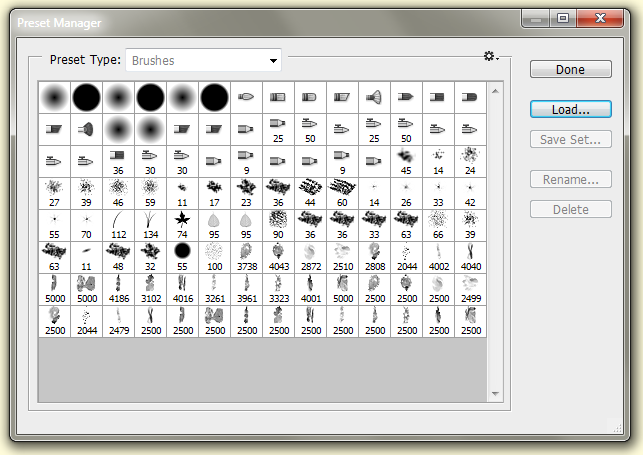
That's all there is to it. Once your brushes are loaded into Photoshop, you hit the letter 'B' to select your brush tool and then you can choose from your different brushes using the drop down in the top toolbar.
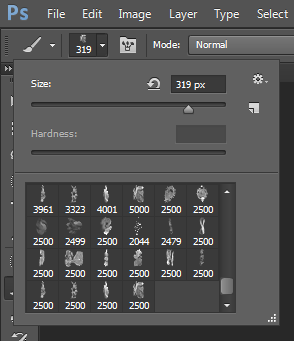
Using Brushes
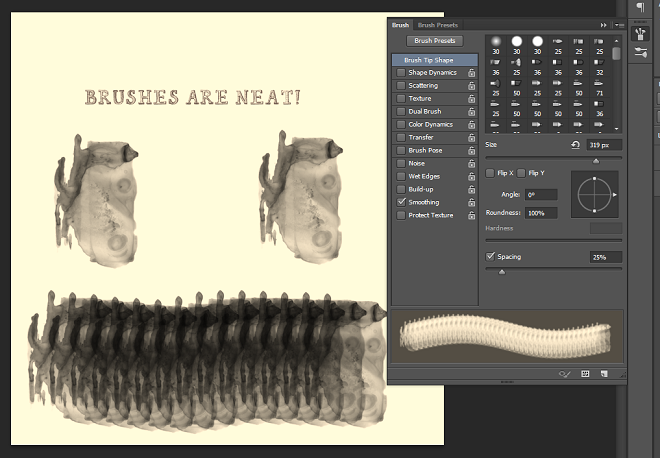
After you've selected the brush you'd like to use, all you have to do is start clicking. As we mentioned above, you can use single clicks for a single placement of the brush stroke, or you can hold the mouse button down and drag your cursor around the screen to create some cool effects. If you notice your brush size is too big, or you just don't quite like the look of the marks its creating, you can control the size, mode, opacity, and flow of the brush using the settings in the top toolbar.

And if you're really feeling adventurous, you can dig into the more advanced settings by opening the brush panel on the right side of Photoshop. If you have the patience for trial and error, tweaking these settings can lead to some really cool things.
Source :- creativemarket.com
Comments
Post a Comment